Our Making Process
MOULD MAKING
The exciting process of creating a new shape begins with the highly technical construction of a ‘profile,’ created by carving a solid piece of plaster. All measurements of the profile have to allow 10% for an element of shrinkage during production. From the profile a ‘Model’ of the actual shape will be made, again in plaster, but this time turned on the lathe to perfect its shape so that the finished shape is as it should be. As you journey through this process, you will see that the final clay shape is itself turned on a lathe to perfect its shape.
The master ‘Block’ mould is created by encasing the Model in plaster, usually in two halves. The Model is set in a bed of clay and then blocked out by boarding out the four sides. For ease of removal the Model is coated in soft soap, so that when the liquid plaster that is poured over the Model and it finally sets, the Model can glide out with ease - not unlike the launch of a new yacht!
The ‘Block’ mould is then used to create the ‘Case’ in the same way. The Case will be used repeatedly to reproduce the working moulds, using the same procedure, but this time, using a very different type of plaster. The plaster used for the Case is very dense, as it has to be tough to withstand multiple use. The plaster for the working mould needs to be more absorbent, so that once filled, it will absorb the moisture from the slip.
Generally, each mould will have a life-span of 30 to 40 ‘fills’ before they start to wear, particularly along the seams, at which point new moulds would be commissioned.
CASTING
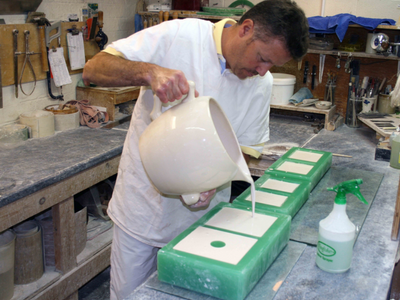
When the moulds are filled with slip, they are left to start the drying process. After a period of time, the absorbent plaster will start to draw the moisture from the slip. Consequently, the slip will dry from the outside edge inwardly. The longer that the mould is left full, the thicker the body of the final piece. An average size piece will be left for upwards of 1 hour depending on its size.[/right]
The caster will then tip away the surplus slip from the centre to create a hollow shape. We now have a clay lining inside the mould of uniform thickness. It is then left inside the mould to continue drying.
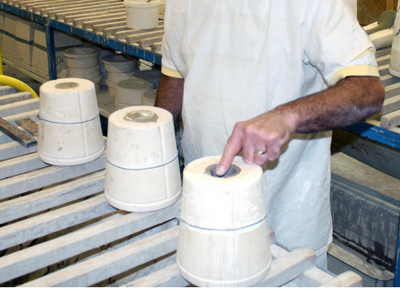
Once dry, the caster will run a knife around the top edge of the piece to remove the surplus clay. If it is then felt that the clay is firm enough, it will be removed from the mould and placed in a drying room overnight.
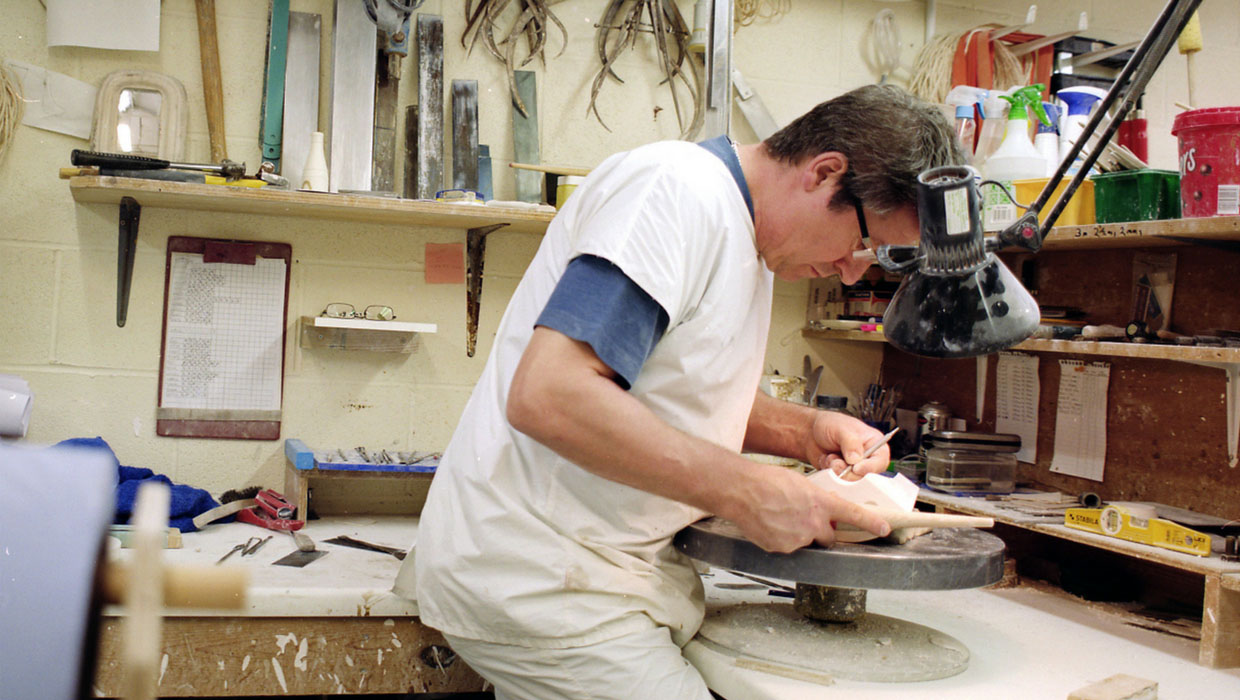
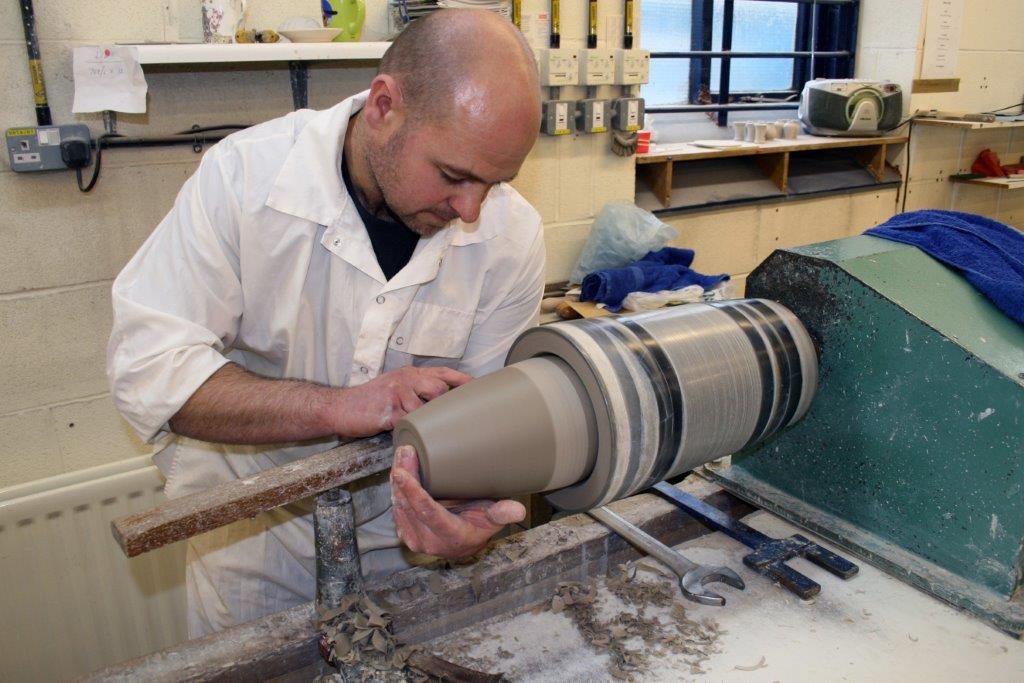
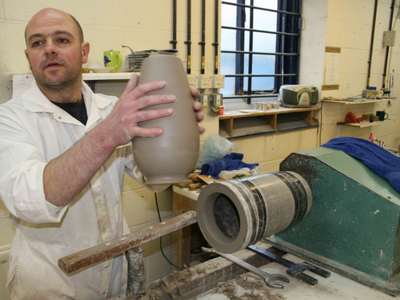
TURNING
The following day the clay shape is turned on a lathe by hand to eliminate the side seems and the surplus clay to achieve a more refined shape. Next, the clay shape is held in place centrally, using a wooden attachment called a chock. The metal tools used to cut away the excess clay are specially shaped to suit each particular piece.
After using skill and experience to judge the correct size and shape of the piece, the turner then puts the lathe into reverse and a much softer metal tool is moved over the surface of the clay to remove any other tool marks which may have been left behind. This burnishing process gives the clay a far smoother surface.
SPONGING
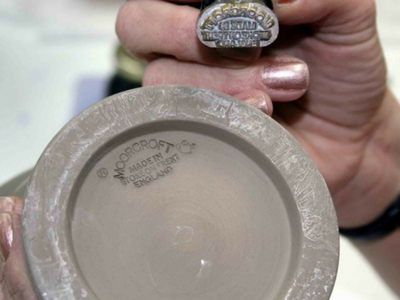
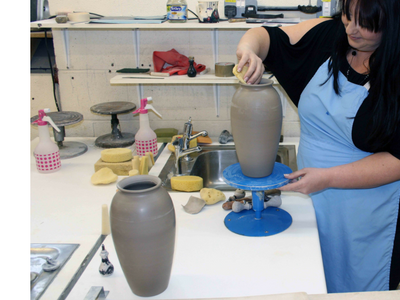
To prepare the piece for decoration, natural sea sponges are used to provide an even smoother finish. It is at this point that the first of the factory marks are impressed. There are three marks, the Moorcroft stamp. Made in Stoke-on-Trent England and a date stamp. In 1990 Moorcroft started to use the alphabet as a means of dating, but rather than using the letters of the alphabet, a symbol is used to represent each letter, taking the first letter of the symbol, starting at A for Arrow in 1990.
TRACING
Decorating each piece of Moorcroft begins when the designer passes line-work in paper form to the tracers. Expertly, the tracers will trace the design onto clear cellophane, using a traditional ink pen and a very special ink. The ink will remain moist on the cellophane until the tubeliner is ready to transfer the outline onto the clay. It is worth adding that the ink burns off in the kiln.

TUBE LINING
The first thing that the tubeliner will do is to transfer the ink outline of the design onto the clay body. With care, the tracing is positioned against the clay and the tubeliner will rub the cellophane with their fingertips, transferring the inked design onto the clay.
Finally, the tubeliner will then use a rubber bag filled with slip, to slip trail the design. The rubber bag is held in the palm of the hand and by applying a constant pressure to the bag the slip is forced through a glass tube onto the clay shape. It takes many years to train a Moorcroft tubeliner.
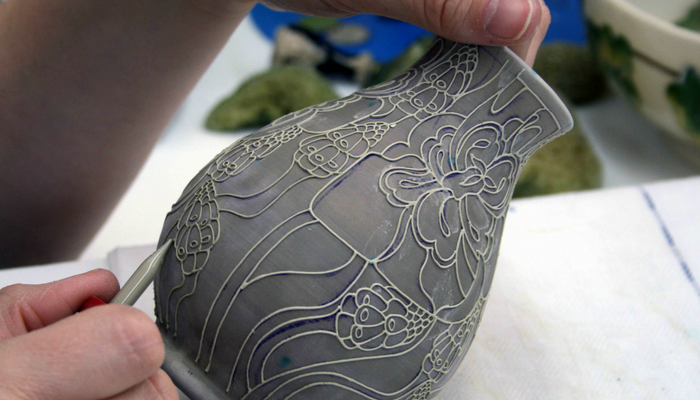
In recent years the tubliners have also learnt the art of sgraffito. This is where a sharp metal tool is used to incise either detail or outline into the clay. The advantage of using this technique for Moorcroft is that it can be used to enhance and put more detail into a design.
Once the tubeliner has completed the piece the base of the piece will be stamped using a brass stamp carrying a monogram of the tubeliners initials, to help identify who has tubelined a piece.
After the piece has completed the decorating process, it will be placed into a controlled drying room overnight. The temperature and moisture are set to enable the raised outline to dry and also the clay body, making it very absorbent. This will enable the paint to be absorbed directly into the clay.
PAINTING

The paints used are metallic oxides, mixed with either gum Arabic or bentonite to thicken the paint. Water is then added to achieve the strength of colour needed.
The painters predominately use a floating technique. This involves gathering as much paint as possible into the brush. He/she will then guide the paint over the surface of the clay, allowing it to float within the defined areas. By tilting the pot, the paint is encouraged to flow in the direction that he/she wants it to. The excess paint lying on the surface is drawn back from the clay into the brush. In fact, the watery paint is quickly absorbed into the body of the clay drying almost immediately. The painter is able to build the layers of paint to achieve the depth of colour on the finished piece. In some instances, there may be 2 or 3 different colours used in one area to achieve a particular colour. Finally, Moorcroft artistry involves blending the colours with the Painter's fingertips or the palms of his/her hand, giving shading and tone. During the firing, the lower colours put on first will burn through to the surface.
Once the piece is complete the painter will highlight the factory marks with a wash of colour, and then paint their own initials onto the base, so that along with the tubeliner we will know exactly who has painted the piece.
BISCUIT FIRING & SELECTION
The decorated piece is now ready for its first firing on the biscuit kiln. The kilns used today are electric, with the majority of the firing taking place over night. Once timers are set, it takes approximately 8 hrs with the kiln reaching a temperature of 1100 °C. After the firing is complete, the ducts at the top of the kiln will start the slow cooling process. Biscuit firing enables the piece to become rigid, and the colours applied in the decorating room are now permanent - although the colours will change substantially after the final firing takes place.
It is at this point that the pieces are selected formally for the first time, checking that there has been no damage done during the firing, such as a firing crack, for example, and that no obvious decoration has been omitted.
Once the piece has been selected the final marks are painted onto the base, including the copyright mark and year the design was created on paper. If the piece is a Limited or Numbered Edition, it is at this point the piece is numbered. There is also the designers symbol, a small picture to denote who has designed the piece. All of the designers have their own individual mark. Limited and Numbered Editions will also normally carry the designer’s signature or monogram.
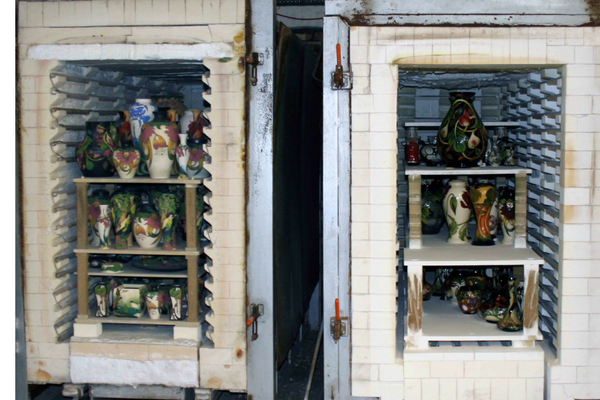
DIPPING & GLOST FIRING
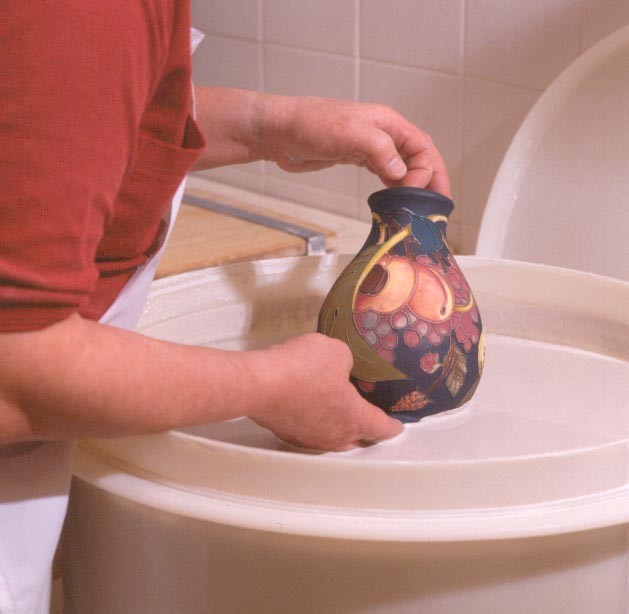
Each piece is lowered into the glaze, because the body is very porous it immediately starts to absorb the moisture from the glaze, leaving the glaze on the surface of the pot. The piece is allowed to dry overnight.
The following morning the glaze is smoothed off by hand and the base is cleaned to stop it sticking to the kiln shelf.Each piece is placed very carefully into the kiln ensuring that no two pieces are too close together. During the firing, the coating of glaze melts and then sets again as a clear glass, a process known as vitrifying. The kiln firing will again take approximately 8 hours, reaching roughly the same temperature as the biscuit firing 1100 °C at its peak. A might chemical reaction occurs between the clay, the paint and the glaze. Interestingly, the lower colours burn through to the surface and the true colours are revealed for the first time. The kiln is allowed to cool and all the pieces are selected.